...
There are many git tools, and styles of working. These instructions focus on the git command line. There are other ways to accomplish the same workflow, including more GitHub GUI-centered, or the gh GitHub command-line tool. We welcome improvements to this page.
Terminology
Fork: On GitHub, fork means making a copy of a repo into your own account so that you have write permissions to push commits and branches to it. This is different than the broader open source term of forking a project because of a disagreement. We are talking about the gentle GitHub term, not the aggressive governance term.
...
Remote: a server copy of a repo. A local repo on your machine can have a number of different remotes, and pull from them separately. Each remote has a name and a URL. The default remote is called “origin”. You can see your remotes' names and URLs with git remote -v.
...
You will have a local repo with two remotes: “origin” will point to your fork in your account, and “upstream” will point to the repo in the openedx org. The Very briefly, the normal flow will be:
Pull from the upstream’s master branch upstream into your fork’s master branch fork to get the latest code.
Make a feature branch in your repo from your repo’s master branch. Don’t work directly
Make your changes, and commit them.
Push your branch to your fork (origin).
Make a pull request against upstream.
Once the review is complete, the owning team will approve and merge the pull request.
...
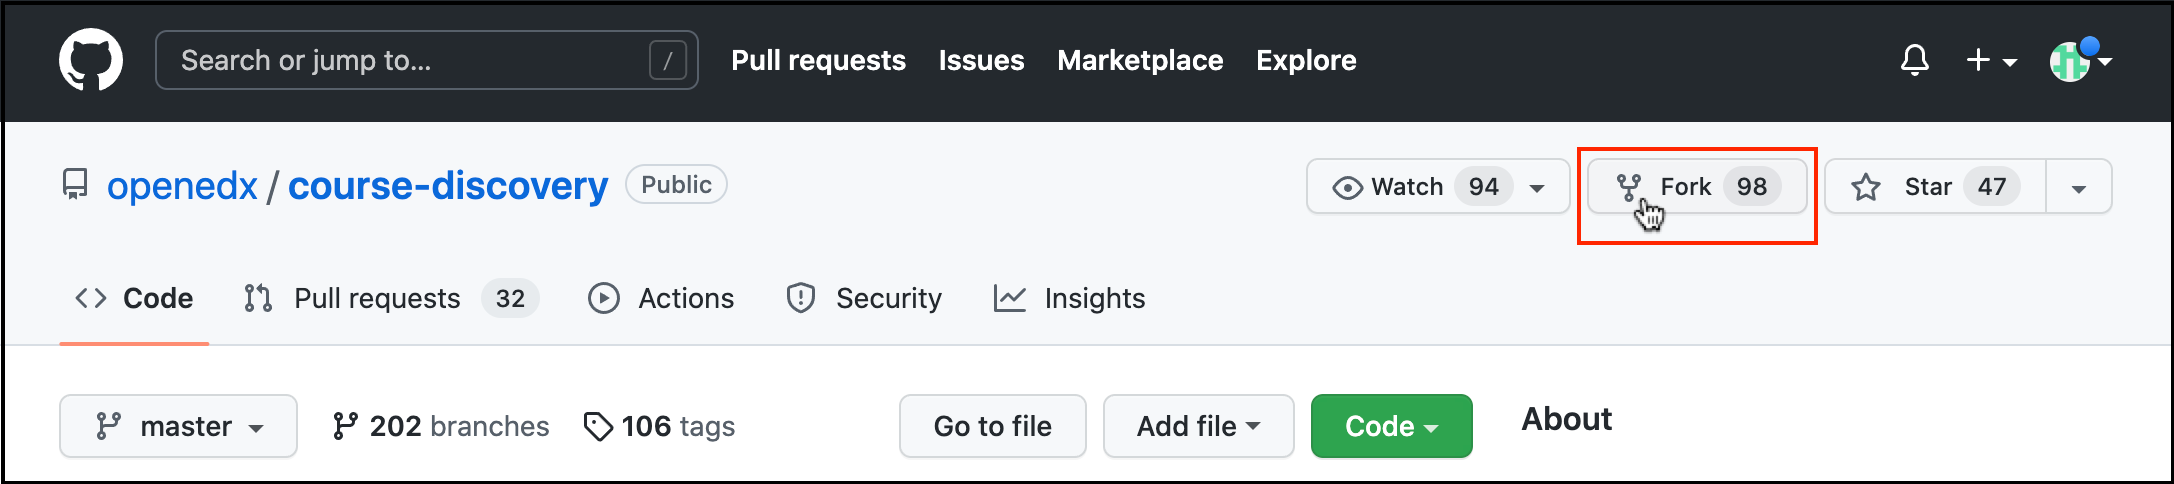
Visit the repo on GitHub.
In the upper-right corner is a Fork button. Click it.:
On the next screen, you will be asked where to fork it, called the Owner. Choose your own personal account (the default choice):
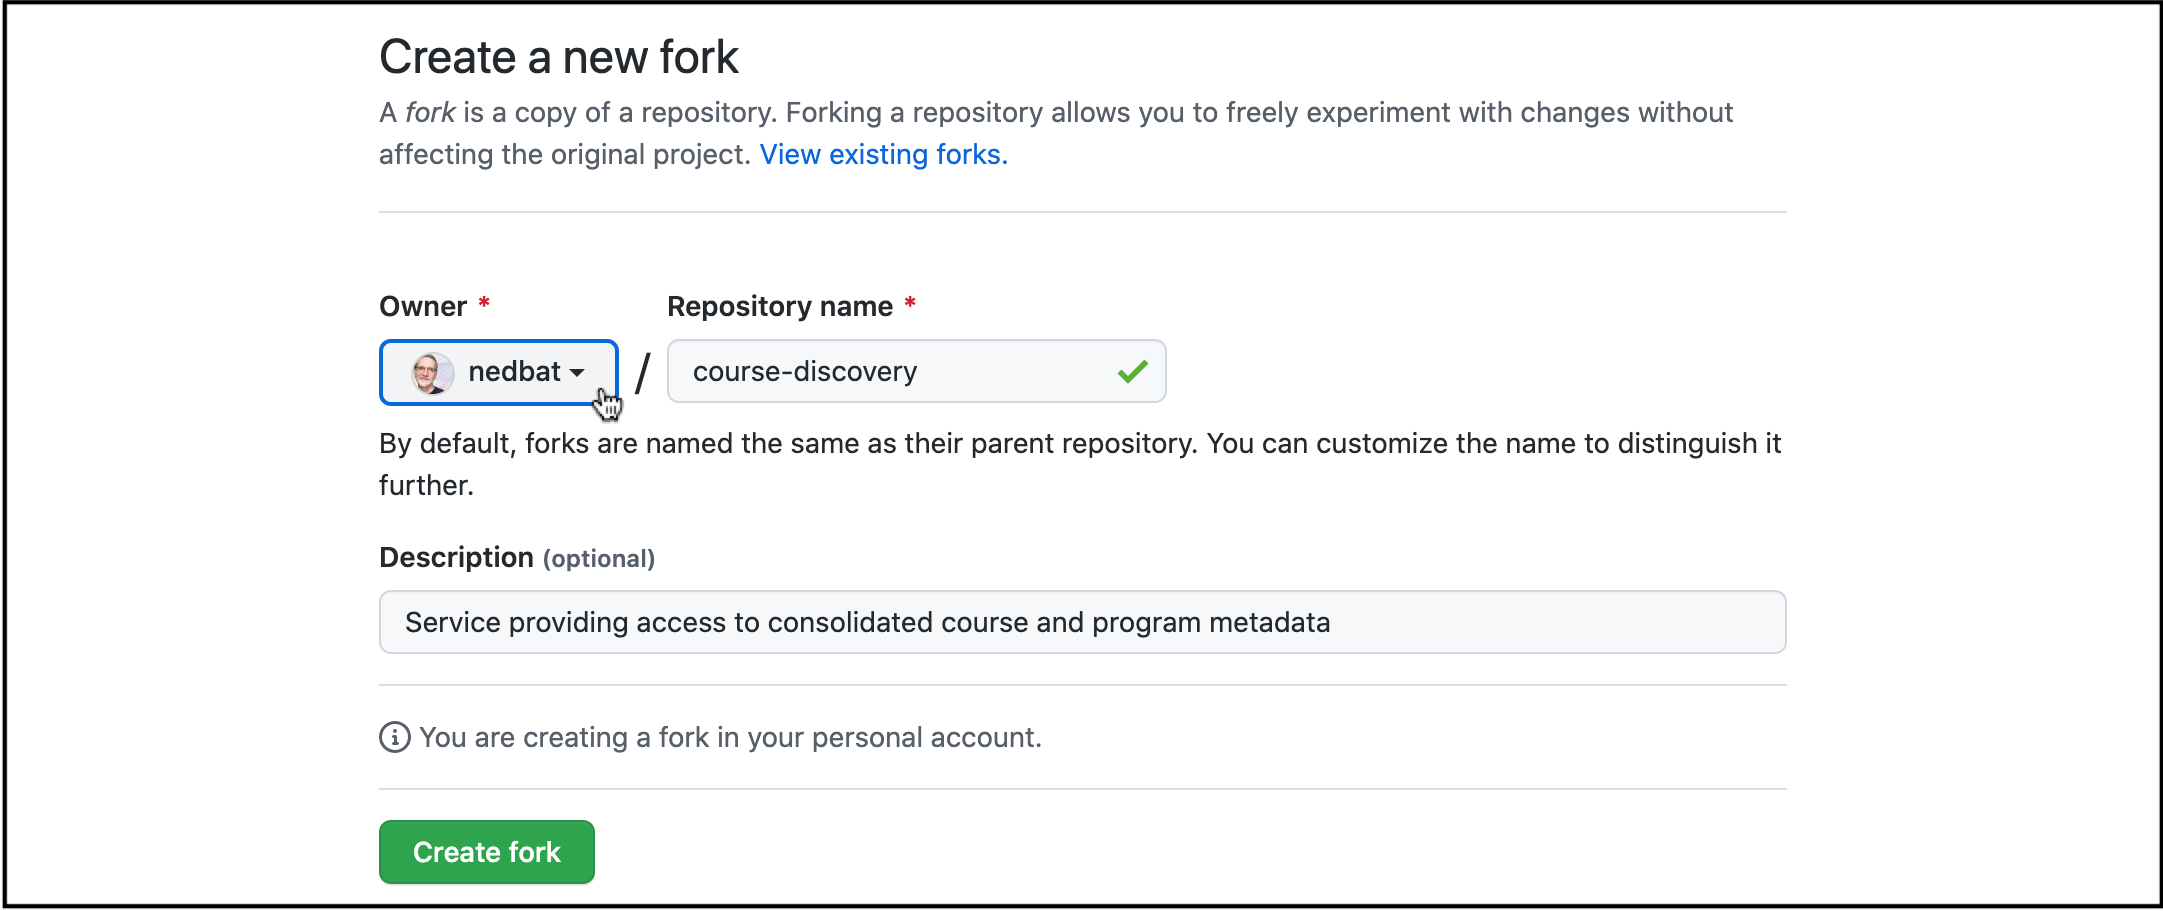
If you are a member of the edx organization, it will be listed in the drop-down, probably with “insufficient permission”, meaning you cannot choose “edx” as the Owner.
DO NOT FORK INTO edx EVEN IF YOU CAN. Use your personal account.
...
Rename the existing remote:
Use
git remote -vto check that the openedx repo is named “origin”Rename the remote to “upstream”:
git remote rename origin upstream.
Add a new remote for your fork:
git remote add origin https://github.com/USER/REPO.git
Keeping your fork up to date
You now have two remote repos (remotes: your fork called “origin” and the openedx core repo ) that you might need to get changes from.
...
Get all the changes locally: git fetch --all.
...
called “upstream”. Before beginning work on a change, you will want to get the latest code from upstream into your fork:
Switch the current branch to master:
git switch master.Merge Pull down the changes from upstream and update your master:
git merge upstream.pull upstream master --ff-onlyIf everything has been done right, this will be a fast-forward merge, with no explicit merge commit. You shouldn’t have changes on your master, but if you do, the
git pullcommand will fail with “fatal: Not possible to fast-forward, aborting.” If this happens, you will need to fix your master branch before continuing. (TODO: explain how to do this.)Push the changes to your fork to keep it up to date:
git push origin master.
Now your master branch is in sync with upstream, both locally and in your fork on GitHub.
...
Once your code has been merged, the steps in “Keeping your fork up to date” will get you ready for the next iteration of work. You can also use those steps if you need to rebase your pull request to base it on the latest changes on master.
Source material
These pages were helpful:
...