...
- In the list of repositories, make sure you have selected the correct repository in which to create your branch.
- (optional but recommended) Switch to the branch on which you want to base your new branch (usually master, but in some cases another working branch), and click Sync. This ensures that you have the latest version before you create a branch off it.
- Click the branch plus icon to create a branch.
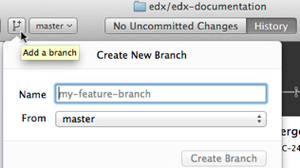
- In the From field, specify the correct branch to base your new branch on. In most cases, this is master, but in some cases you will want to create your new branch off another branch.
- In the Name field, enter a name for the new branch according to the following format:
<your-name>/doc/<story ID or a summary for a group of stories> - Click Create Branch.
- Github Desktop refreshes; you are now on your new branch.
- The files that you now see in Finder on your computer are the ones in this branch.
- To switch between branches any time, select the branch to switch to from the dropdown list of branches.
- To switch to a branch on another repository, select the repository from the list of repositories and then select the branch.