How to Run the eCommerce Service in Devstack
Instructions for how to bring up the ecommerce service in devstack.
Step-by-step guide
In order to run the ecommerce service in devstack:
SSH into a running devstack with the ecommerce service installed:
$ vagrant ssh
Switch to the
ecommerceuser:$ sudo su ecommerce
Activate the ecommerce virtual environment:
$ source ../venvs/ecommerce/bin/activate
Build the dependencies and statics:
$ make requirements


$ make static
Start the ecommerce server:
$ python manage.py runserver 0.0.0.0:8002 --settings=ecommerce.settings.devstack
In a separate tab/window, SSH into the same devstack, and switch to the
edxappuser:$ sudo su edxapp
Verify that the following settings in /edx/app/edxapp/
lms.env.json(the file is up one directory level to the edx-platform directory that the su command switched you to) are correct The ecommerce file that you are checking the values against is /edx/etc/ecommerce.yml. The variable name for JWT_ISSUER may be JWT_ISSUER (a single value) or JWT_ISSUERS (an array of values) depending on the application version:"ECOMMERCE_API_URL": "http://localhost:8002/api/v2/" "ECOMMERCE_PUBLIC_URL_ROOT": "http://localhost:8002/" "JWT_ISSUER": "http://127.0.0.1:8000/oauth2" // Must match the JWT_ISSUER setting on ecommerce "OAUTH_ENFORCE_SECURE": false "OAUTH_OIDC_ISSUER": "http://127.0.0.1:8000/oauth2"
Verify that the following settings in /edx/app/edxapp/lms.auth.json are correct - comparing against the ecommerce.yml file from the previous step:
"EDX_API_KEY": "replace-me" // Must match EDX_API_KEY setting on ecommerce
"ECOMMERCE_API_SIGNING_KEY": "insecure-secret-key" // Must match the JWT_SECRET_KEY setting on ecommerce
Start the LMS server:
$ paver devstack lms
If you haven't already, you will need to create a superuser for the lms application in Django so that you can view/update the Django admin console. Follow the guide How to Create admin user in lms/cms/etc.
- Now that we have admin privileges, we need to find two values that will be used during the ecommerce setup process for Oauth. Log in to the lms instance with your account, and navigate to http://localhost:8000/admin/. Find the following section:
- Click on the 'Clients' link, and on the page that it takes you to, click on the ecommerce client (localhost:8002):
Copy down the 'Client-id' and 'Client-secret' values:
Jump back to your vagrant ssh shell. Exit out of the edxapp user (run whoami if you aren't sure) and switch to the ecommerce user account. Source the activate environment variables into your running shell.
$ whoami
edxapp
$ exit
$ sudo su ecommerce
$ source ../venvs/ecommerce/bin/activate
Using the client-id and client-secret values from above, run the 'create_or_update_site' command in the python command-line interface. The partner code is arbitrary and can be any value you like, for payment processors, use paypal, and for the email address, use one that you don't mind getting dev emails delivered to:
$ ./manage.py create_or_update_site --site-domain localhost:8002 --lms-url-root http://localhost:8000 --partner-code edx --payment-processors paypal --client-id ecommerce-key --client-secret ecommerce-secret --from-email your-email@edx.org
Restart the ecommerce server:
$ python manage.py runserver 0.0.0.0:8002 --settings=ecommerce.settings.devstack
- Verify that you can both access the ecommerce server, and login (SSO redirect using LMS). Navigate to localhost:8002/login - you should be automatically logged in:
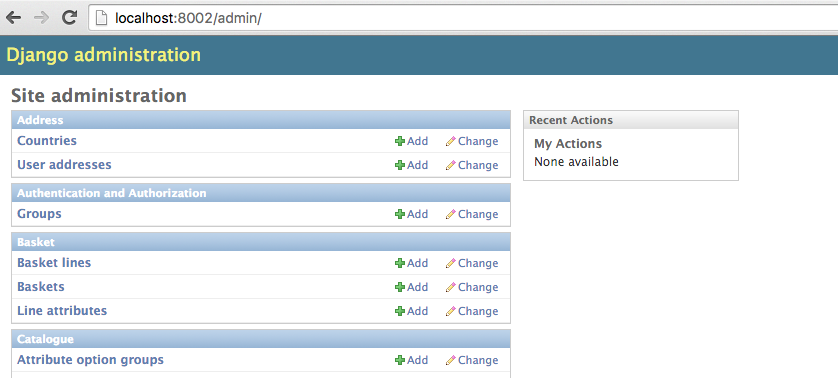
- The Oauth login from LMS should also carry over the superuser status from that account profile. Verify that you have admin rights. Navigate to localhost:8002/admin:
Both services are now up and running. If you've configured any products, they should now be fulfilled by the ecommerce service.
Troubleshooting
Enrolling in a course is not creating an order in ecommerce:
- Enrolling as a logged in user is not currently instrumented. Try logging out, then enrolling in the course, then log in when prompted.
- If you get a 409 response doing this, make sure the user you are logging in as is not already enrolled in that course.
Related articles


