Video Pipeline Testing (Sandbox)
Build and Configure a Sandbox
- Start a sandbox building. In the options, you should see the following:
Update the branches and check the boxes. If you're planning on actually encoding videos, you'll need video_pipeline and video_encode_worker, however if you're just testing API endpoints, video_pipeline is sufficient.
Configure edX Studio
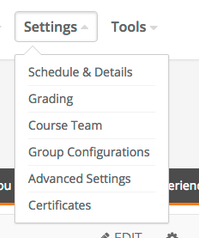
In studio>advanced settings, scroll to the bottom to find the "Video Upload Credentials" dialogue.
Add the following json to the text box, and save:
{
    "course_video_upload_token": "shared_course_token"
}
If you haven't, create an edxapp superuser (The provided example sets 'staff' as a superuser, which is fine).:
sudo su -s /bin/bash edxapp
cd
/edx/bin/python.edxapp /edx/bin/manage.edxapp lms manage_user staff staff@example.com --staff --superuser --settings=production
exit # deactivate env
# Activate Frontend Env.
sudo su veda -s /bin/bash;
source ~/veda_env;
cd /edx/app/veda/veda;
# Run mgmt command
python manage.py createsuperuser # follow prompts
Check and configure VAL access
Log in to the django admin (usually ${YOUR_SANDBOX_URL}/admin). Go to Oauth2 > Clients. There should be an extant client with a suffix like 'api/val/v0'. Click through.
This should be FK-associated with a user, click the magnifying glass icon and associate this with the 'veda_service_user' user. (PK=8 as of this writing, but that may change)
Running
You should now be able to upload a video file (here's a sample) and have it process.
You might need to get a snack, this can be slow. Eventually it should resolve to look like this:
Debugging
sudo su veda -s /bin/bash;
source ~/veda_env;
cd /edx/app/veda/veda;
sudo su veda_pipeline_worker -s /bin/bash;
source ~/veda_pipeline_worker_env;
cd /edx/app/veda_pipeline_worker/veda_pipeline_worker;
The actual encoding engine. Typically a cluster of 30-60 processes controlled via RabbitMQ/Celery, connected to pipeline worker via Django REST API.
sudo su veda_encode_worker -s /bin/bash;
source ~/veda_encode_worker_env;
cd /edx/app/veda_encode_worker/veda_encode_worker;
sudo /edx/bin/supervisorctl
status
{start | restart | stop } {worker process} # for any worker you see, for example, "restart veda_encode_worker"
# Activate Frontend Env.
sudo su veda -s /bin/bash;
source ~/veda_env;
cd /edx/app/veda/veda;
# Run mgmt command
python manage.py createsuperuser # <--follow prompts
VEDA Logs
All the log files are present in /edx/var/log/supervisor, you can see the current logs on supervisor cli interface like below and the complete logs in the previously mentioned directory
sudo /edx/bin/supervisorctl
# then, for example
tail -f veda_encode_worker stderr # for veda_encode_worker errlog
Execute the tail command for other processes to see their logs
Complete Video Flow Testing
For a complete video testing on sandbox, we also need to enable/add the below settings from sandbox platform admin: Once all the settings are configured, Follow the below steps to ensure that complete video flow is working on sandbox.
- Open Video Uploads page
- Add Cielo24/3Play Credentials. Please see this doc for details.
- Add Transcript settings
- Upload Video
- If everything is working on sandbox than all the uploaded videos should be completed with Ready or Transcript Ready status and one should see Thumbnail and expected Transcripts.
Enable Video Uploads by Default: This will enable the Video Uplods page for all courses by default.
Enable HLS Playback: This will enable the HLS playback for all courses.
Enable Video Transcript: This will enable the Transcript Settings on Video Uploads page so that authors can add Cielo24/3Play Media credentials and transcription settings.
Add Video Image Switch: This will enable Video Image Thumbnail on Video Uploads page.


